Getting Started with Kotlin Multiplatform for Android and iOS
Kotlin
Tools
We are going to focus in mobile apps, where Kotlin Multiplatform Mobile it is used by more and more developers. However, there are a lot of developers who has heard something about it, but they don’t know how to start with it.
So, the goal of this article is to tell you some useful advices in order to help you to understand what this technology is and finally developing you first KMM project.
KMM Project Structure
- Android Studio
- XCode
- Java
- Kotlin Multiplatform Mobile Plugin
KMM Project Structure
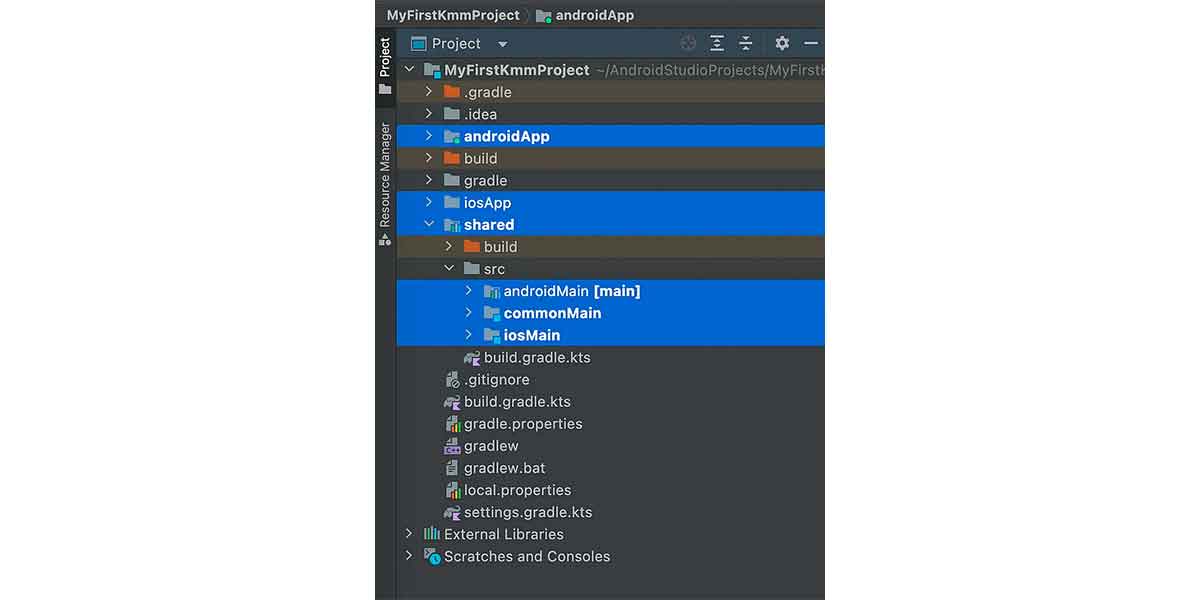
KMM project structure view in Android Studio
Shared module
As I said, the shared module contains the code that is common for Android and iOS applications. Regardless, you may need to have a platform-specific versions of code to implement the same logic on both platforms.
As we will se later, we have the expect/actual mechanism (where expect class is like an interface and actual classes are its implementation) to manage these situations. We will organize the source code of the shared module in three source sets:
- commonMain: where is located the both code between Android and iOS. Here are included the common classes declarations, called expect declarations.
- androidMain: where is located the Android-specific part. Here you adapt the expect class behavior to Android and it is called actual implementations.
- iosMain: where is located the iOS-specific part. Here you adapt the expect class behavior to Android and it is called actual implementations.
androidApp module
iOSApp module
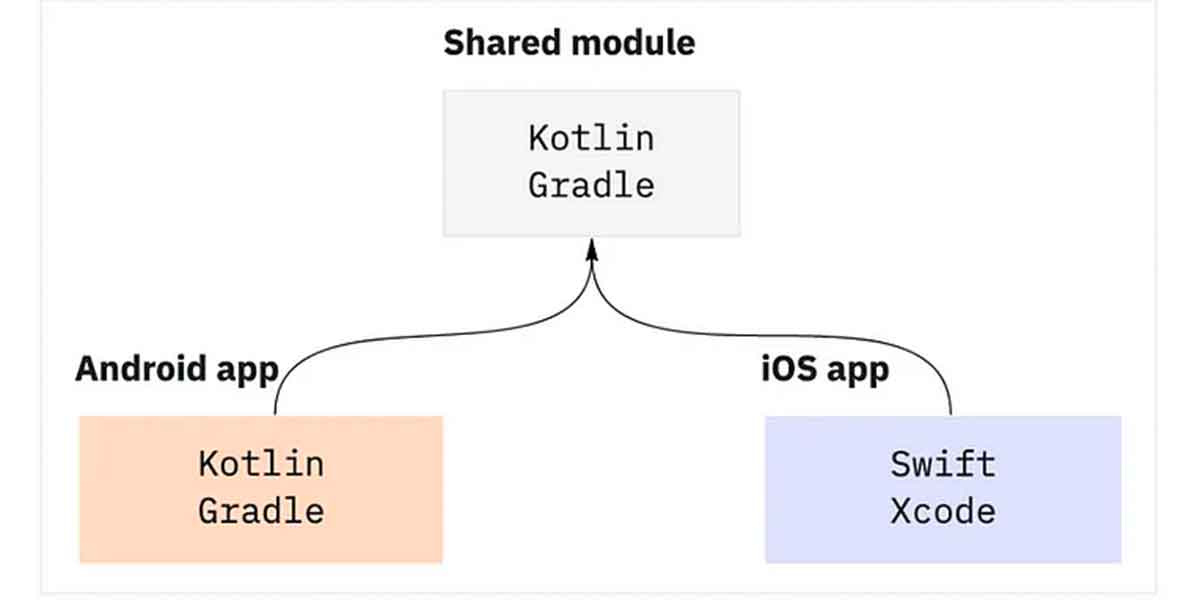
KMM project structure
Dependencies
On the one hand, Multiplatform dependecies are multiplatform libraries, which have been developed to support both platforms. These dependencies are added to commonMain source set.
On the other hand, Native dependencies are handled with the specific-platform manager: cocoaPods or Gradle.
Besides, it will be some situations where you will need to add multiplatform dependencies which have been developed to specific-android or specific-ios platform, in spite of the fact they were developed to Kotlin Multiplatform. These dependencies are added to androidMain and iosMain source set respectively in the gradle config of shared module. We will see an example later.
Maybe, you are wondering if it is possible to add specific-platform libraries to Kotlin Multiplatform. The response is yes, but it is not strongly recommended. For instance, Kotlin supports Objective-C dependencies and Swift dependencies if their APIs are exported to Objective-C. Pure Swift dependencies are not yet supported.
As a result, the more usual situation is to use Multiplatform dependencies to develop the shared code and Native dependencies to develop the specific-platform code inside androidApp and iosApp module.
Your First KMM Project
First, open Android Studio and select to create a Kotlin Multiplatform App. And in the next screen, select ios framework distribution to regular framework.
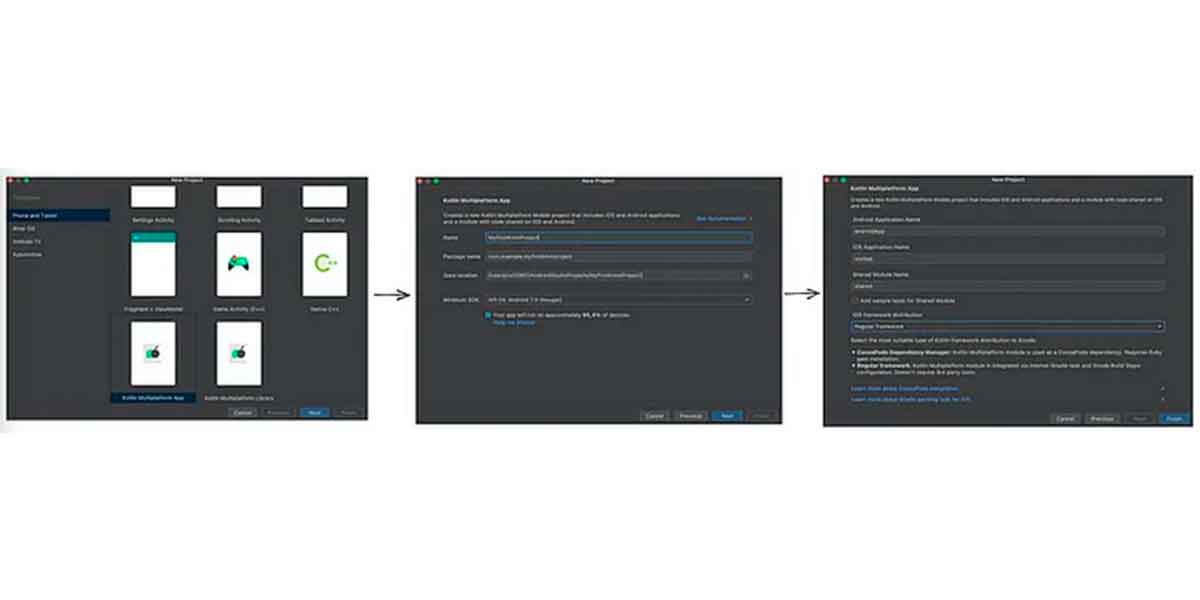
Steps to create a KMM project in Android Studio
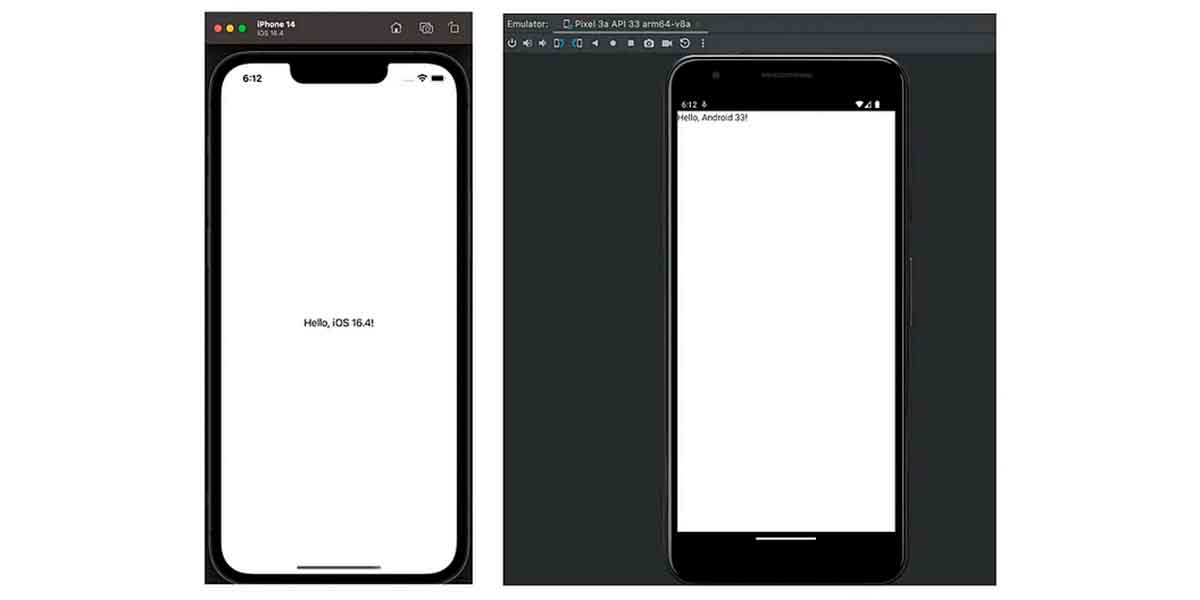
First iOS and Android execution
Besides, you can open the file MainActivity.kt located in androidApp module and the file ContentView.swift located in iOSApp module. After that, you will see that we are displaying the Greeting.greet() result text. If you try to modify this function in Greeting.kt class, the message will change in both applications.
The message contains the OS version of each platform. So, if you open the Platform.kt file located in commonMain source set you will see the expect class declaration.
And its implementation is in the Platform.kt files, located in androidMain and iosMain source sets respectively, where we develop the actual clasess to provide behavior to the interface. By this way, we are able to print the SO version of both platforms.
interface Platform {
    val name: String
}

expect fun getPlatform(): Platform
class AndroidPlatform : Platform {
    override val name: String = "Android ${android.os.Build.VERSION.SDK_INT}"
}

actual fun getPlatform(): Platform = AndroidPlatform()class IOSPlatform: Platform {
    override val name: String = UIDevice.currentDevice.systemName() + " " + UIDevice.currentDevice.systemVersion
}

actual fun getPlatform(): Platform = IOSPlatform()First, we are going to display the current date. So we are going to add the kotlinx-datetime library. This library has multiplatform support, so we will add it to commonMain source set:
sourceSets {
    val commonMain by getting {
        dependencies {
            implementation("org.jetbrains.kotlinx:kotlinx-datetime:0.4.0")
        }
    }
   ...
  }
Then, we create a new file in shared module: shared/src/commonMain/kotlin/Date.kt:
import kotlinx.datetime.*

fun getToday(): String {
    val today = Clock.System.todayIn(TimeZone.currentSystemDefault())
    return today.dayOfMonth.toString() + " / " + today.monthNumber.toString() + " / " + today.year.toString()
}
Finally, we modify greet() function to display the current date:
fun greet(): String {
        return "Hello, ${platform.name}!" + "\n\n" + "Today is ${getToday()}"
} 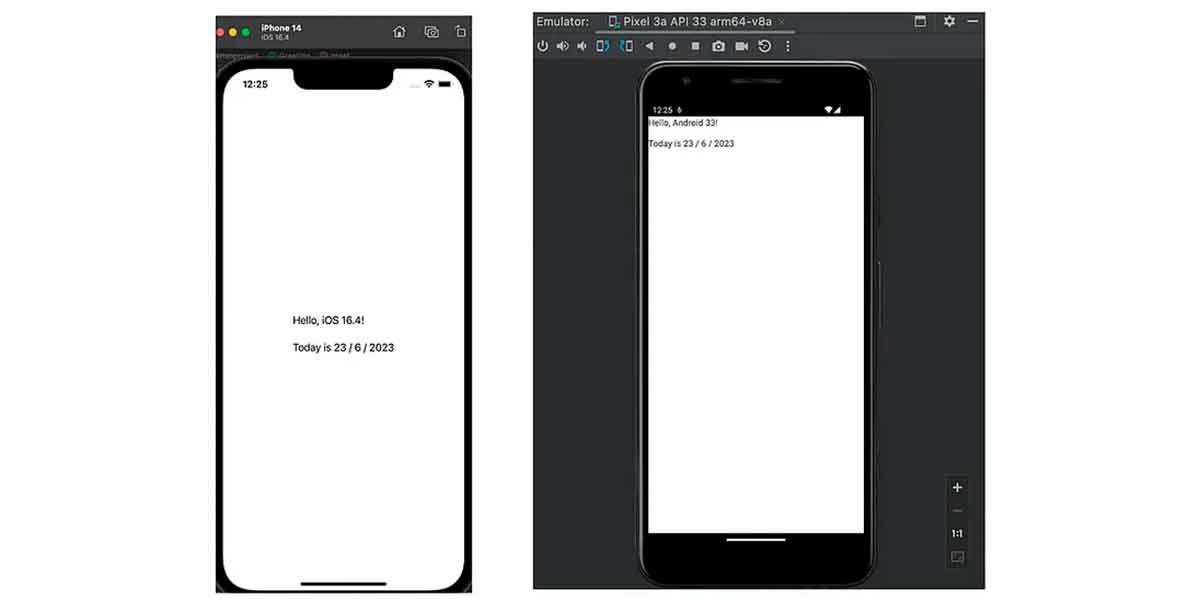
iOS and Android execution displaying the current date
However, we will need to add some multiplatform dependencies to commonMain and some multiplatform dependencies to androidMain and iOSMain source sets because they are specific-platform dependencies.
To do the API request we are going to add these dependencies: kotlinx.coroutines, kotlinx.serialization and Ktor. And we need to add the specific-platform ktor-client to each source set.
val ktorVersion = "2.2.4"

sourceSets {
    val commonMain by getting {
        dependencies {
            implementation("org.jetbrains.kotlinx:kotlinx-datetime:0.4.0")
            implementation("org.jetbrains.kotlinx:kotlinx-coroutines-core:1.6.4")
            implementation("io.ktor:ktor-client-core:$ktorVersion")
            implementation("io.ktor:ktor-client-content-negotiation:$ktorVersion")
            implementation("io.ktor:ktor-serialization-kotlinx-json:$ktorVersion")
        }
    }
    val androidMain by getting {
        dependencies {
            implementation("io.ktor:ktor-client-android:$ktorVersion")
        }
    }
    val iosMain by creating {
        dependencies {
            implementation("io.ktor:ktor-client-darwin:$ktorVersion")
        }
        ...
    }
    ...
}
Then, we are going to add the API request. First, we will define our model:
import kotlinx.serialization.SerialName
import kotlinx.serialization.Serializable

@Serializable
data class RMCharacterList (
    @SerialName("results")
    val characters: List<RMCharacter>,
)
@Serializable
data class RMCharacter(
    val name: String,
    val species: String,
)
Second, we will add the API request call to our common logic in Greeting.kt.
import io.ktor.client.HttpClient
import io.ktor.client.call.body
import io.ktor.client.plugins.contentnegotiation.ContentNegotiation
import io.ktor.client.request.get
import io.ktor.serialization.kotlinx.json.json
import kotlinx.serialization.json.Json

class Greeting {
    private val platform: Platform = getPlatform()
    private val httpClient = HttpClient {
        install(ContentNegotiation) {
            json(Json {
                prettyPrint = true
                isLenient = true
                ignoreUnknownKeys = true
            })
        }
    }
    @Throws(Exception::class)
    suspend fun greet(): String {
        val response: RMCharacterList =
            httpClient.get("https://rickandmortyapi.com/api/character").body()
        val oneRMCharacter = response.characters.firstOrNull()
        return "Hello, ${platform.name}!" +
                "\n\n" +
                "Today is ${getToday()}" +
                "\n\n" +
                "First character is ${oneRMCharacter?.name} and is ${oneRMCharacter?.species}"
    }
}
Finally, we need to add internet access permission into the Manifest.xml and update our Android App and iOS App to show the API response.
We will modify MainActivity.kt to update Android App.
import androidx.compose.runtime.*

class MainActivity : ComponentActivity() {
    override fun onCreate(savedInstanceState: Bundle?) {
        super.onCreate(savedInstanceState)
        setContent {
            MyApplicationTheme {
                Surface(
                    modifier = Modifier.fillMaxSize(),
                    color = MaterialTheme.colors.background
                ) {
                    var text by remember { mutableStateOf("Loading") }
                    LaunchedEffect(true) {
                        text = try {
                            Greeting().greet()
                        } catch (e: Exception) {
                            e.localizedMessage ?: "error"
                        }
                    }
                    GreetingView(text)
                }
            }
        }
    }
}
And we will modifiy iOSApp.swift and ContentView.swift to update iOS App.
import SwiftUI

@main
struct iOSApp: App {
var body: some Scene {
  WindowGroup {
   ContentView(viewModel: ContentView.ViewModel())
  }
}
}import SwiftUI
import shared

struct ContentView: View {
    @ObservedObject private(set) var viewModel: ViewModel
    var body: some View {
        Text(viewModel.text)
    }
}
extension ContentView {
    class ViewModel: ObservableObject {
        @Published var text = "Loading..."
        init() {
            // Data will be loaded here
            Greeting().greet { greeting, error in
                        DispatchQueue.main.async {
                            if let greeting = greeting {
                                self.text = greeting
                            } else {
                                self.text = error?.localizedDescription ?? "error"
                            }
                        }
                    }
        }
    }
}
If we run both project we will see this result.
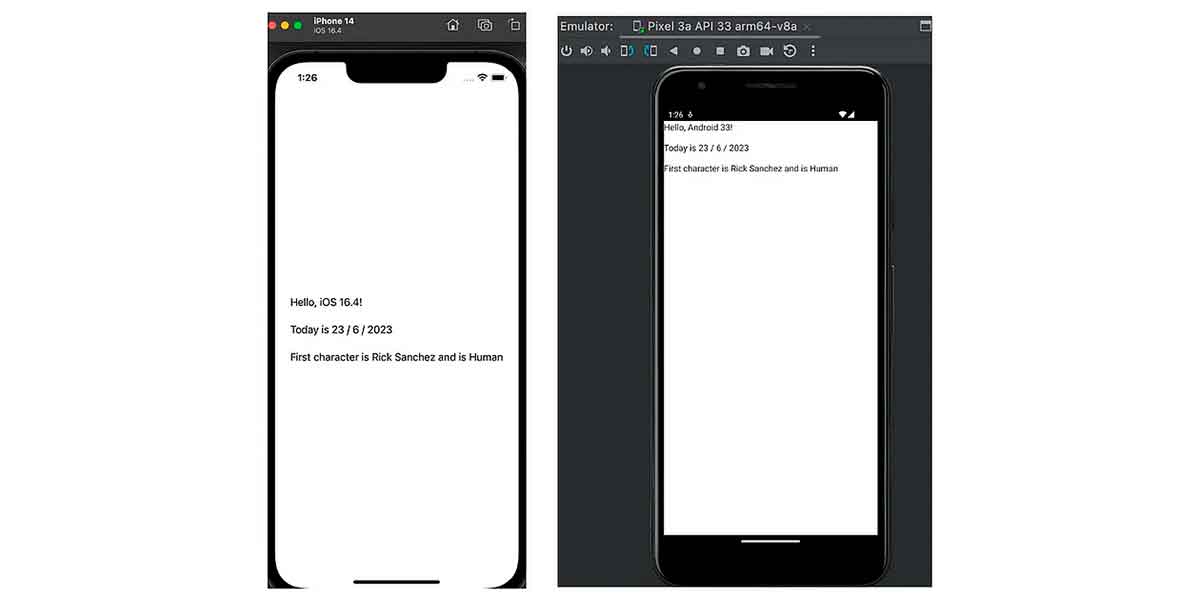
Result
Specifically, in this project you have added some common logic in the shared module to build a greeting with specific-platform code in the shared module. And then you have added specific-platform code to implement the UI in both platforms: Android and iOS.
I hope that this post help you to begin with KMM as it did with me. There are some breaking changes that I have tried to explain the best I know, but from my honest opinion, they are not so complicated.
Besides, if you are an Android developer, as you can see, the change is not very big. On the other hand, if you are an iOS developer the breaking changes are bigger. However Kotlin and Swift are very similar languages, so you will be ready to develop a KMM project very soon, little by little.
Now, you are ready to upgrade your KMM project adding some new features. Good luck!


